

Preface
If you have scoured the knowledge base, forums and support articles in the hopes of understanding and resolving problems with the code snippet plugin running correctly on your wordpress site then the following guide aims to provide an alternative option and path that our support team have found helpful.
One wordpress site is as similar to another as a cappuccino is to a latte! For some this may be blasphemy but generally speaking the fundamentals between the two are similar. The major differences lie in the server environment that hosts the site (server system, settings and modules/extensions, security settings, etc.) and the wordpress environment (wordpress version, which theme, plugins installed and activated, etc.) all of which can result in 2 seemingly similar entities becoming quite different and distinct and can inevitably lead to some encountering problems.
Introduction and Disclaimer
This guide has been developed with the input of the code snippets support team as a troubleshooting step that is taken after initial steps have been tried to help identify the underlying issue and bring many of the unknown variables (server environment) into the known by using a standard hosting environment. This environment is provided by InstaWP - a third party hosting provider specialising in wordpress sites, although we as code snippets have a working relationship with InstaWP this guide is not meant to promote InstaWP's services, nor are we receiving any financial incentives to do this.
What will be achieved by the end of this guide?
The goal of this guide is to produce a duplicate or clone of your current wordpress site into an InstaWP hosted temporary container (which requires an InstaWP account). From here you can quickly rule out a number of factors that may be suspected as the cause of any plugin errors or bugs and safely take additional troubleshooting steps that you would not normally take on your live production site.
Step 1:
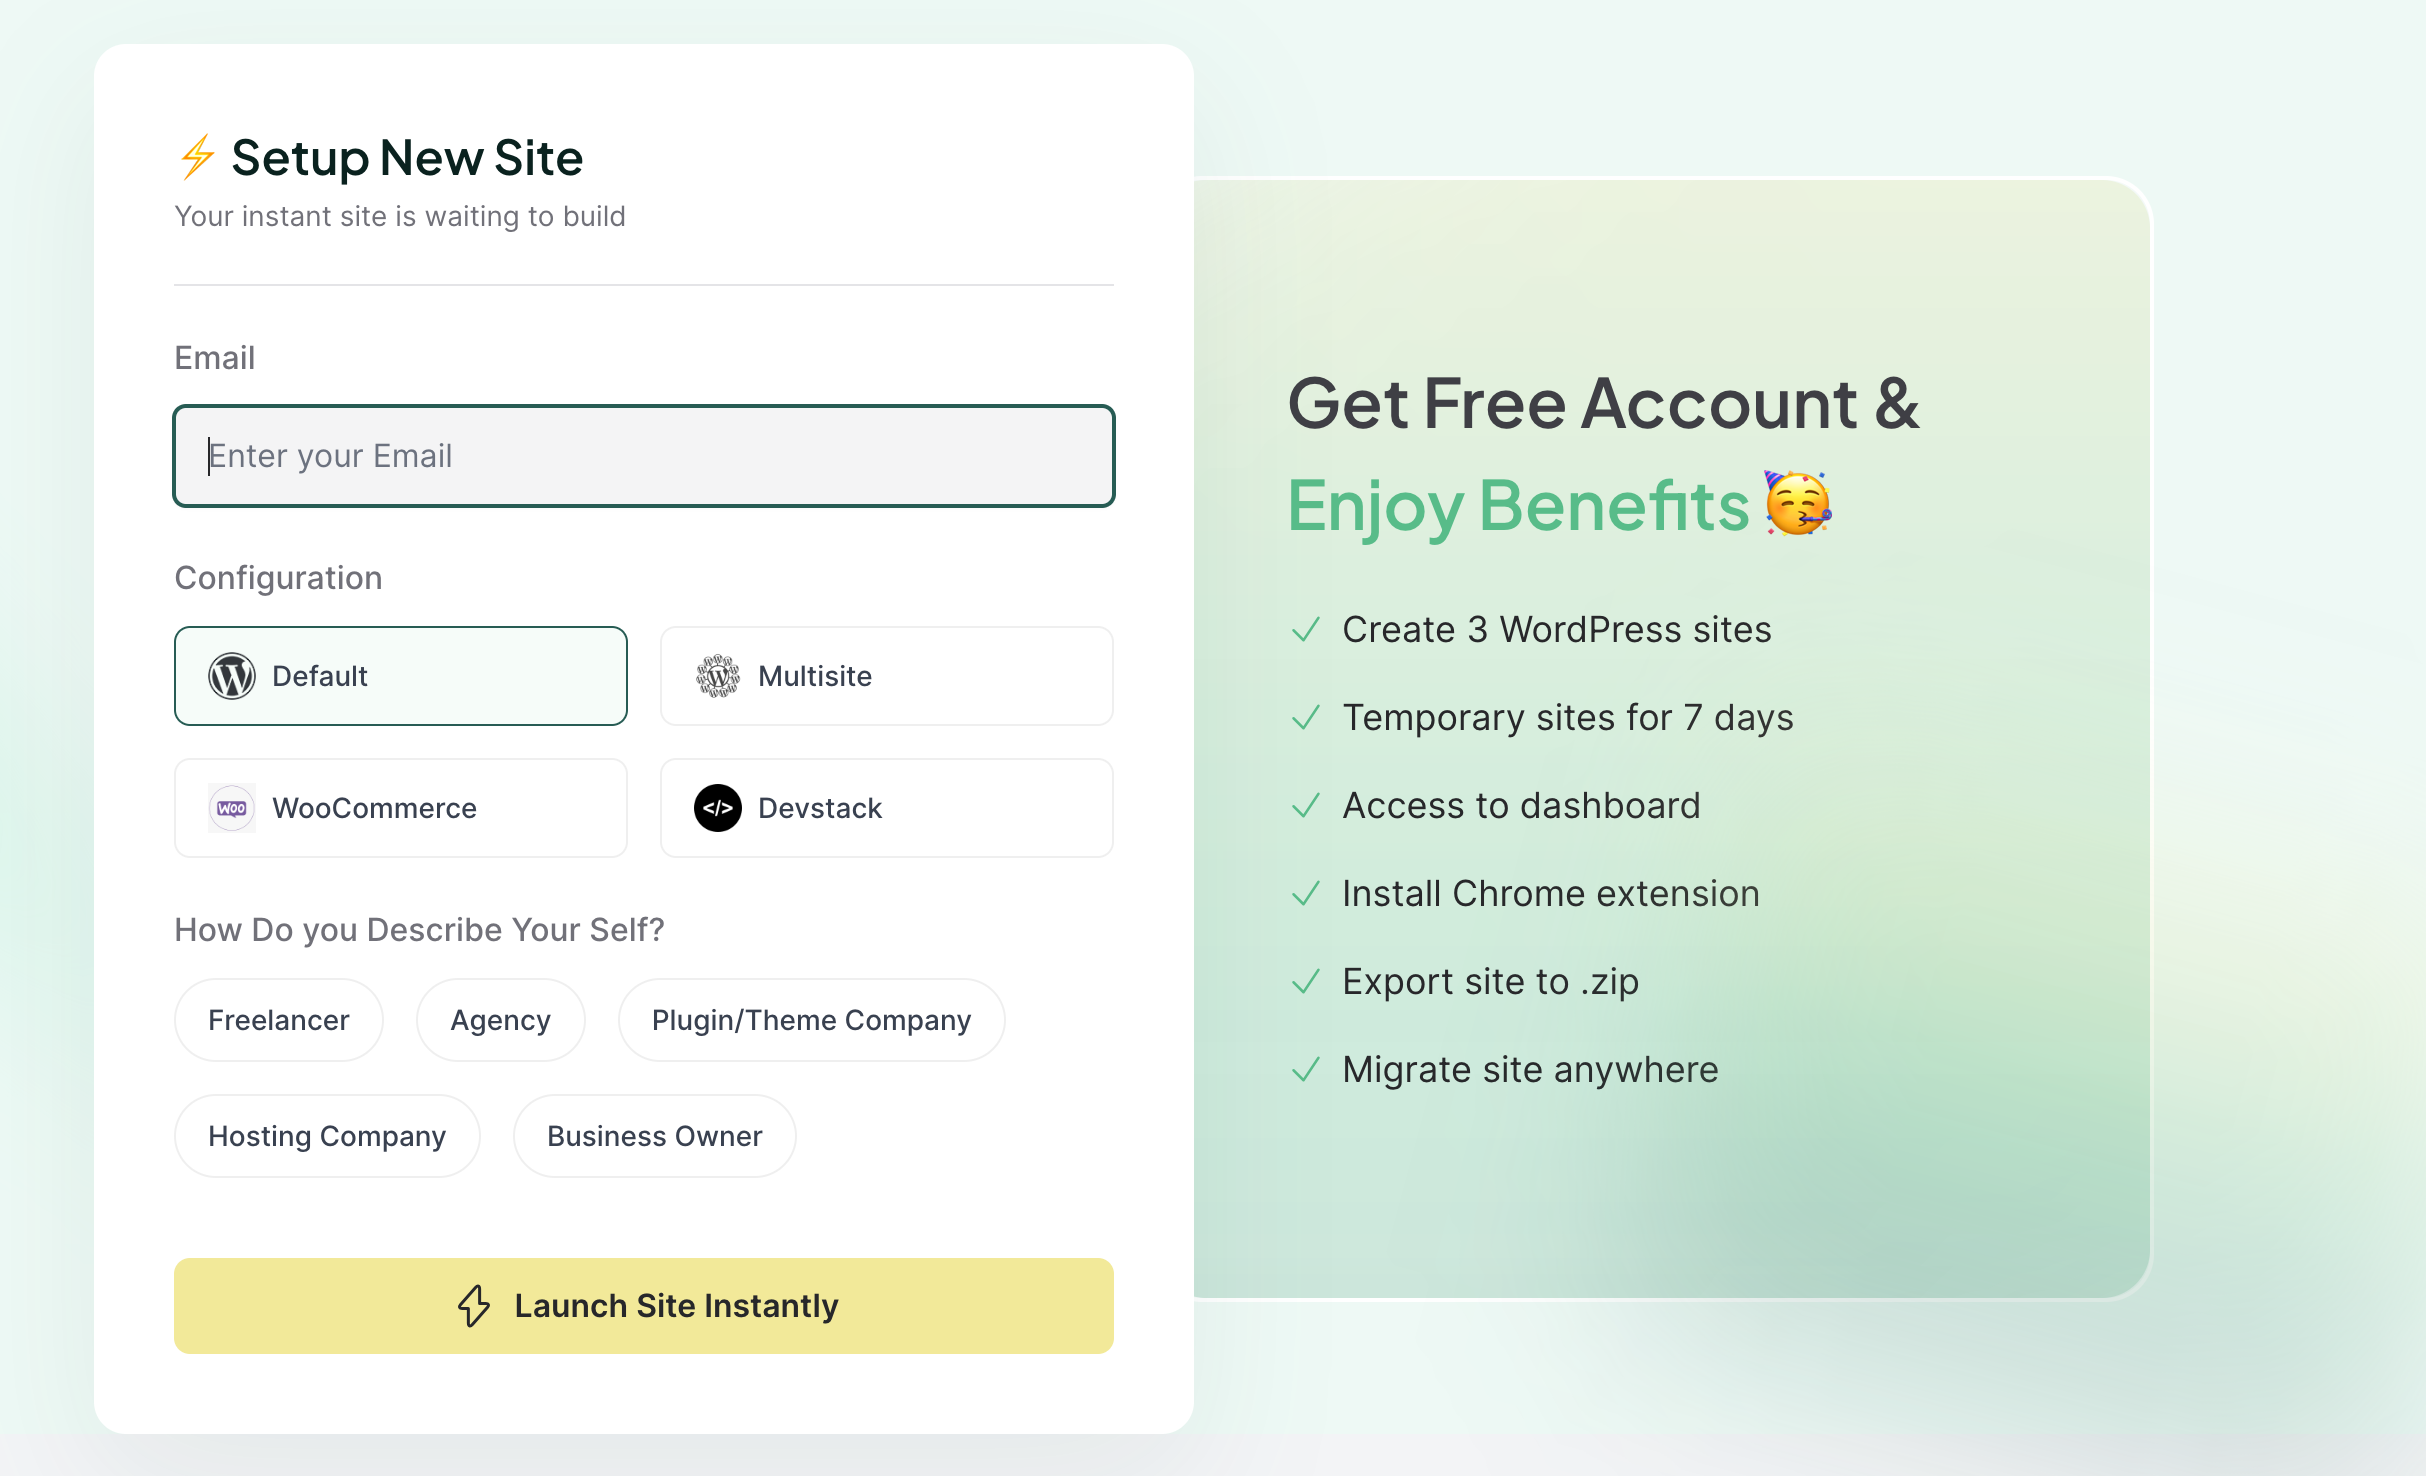
At the time of writing this guide (October 2023) InstaWP is offering free (and paid plans) and for the purpose of this guide a free plan is sufficient but has some limitations on the duration that the temporary site is active for. To proceed head over to InstaWP and click on Get started to register for an account:
Currently as part of the registration process you will need to enter your email address and choose default configuration then launch button to be taken to a page that shows the URL and login credentials for the wordpress site you just created.
Note: You will also receive an email when the site is ready as well as a separate one with your InstaWP login credentials.
Step 2:
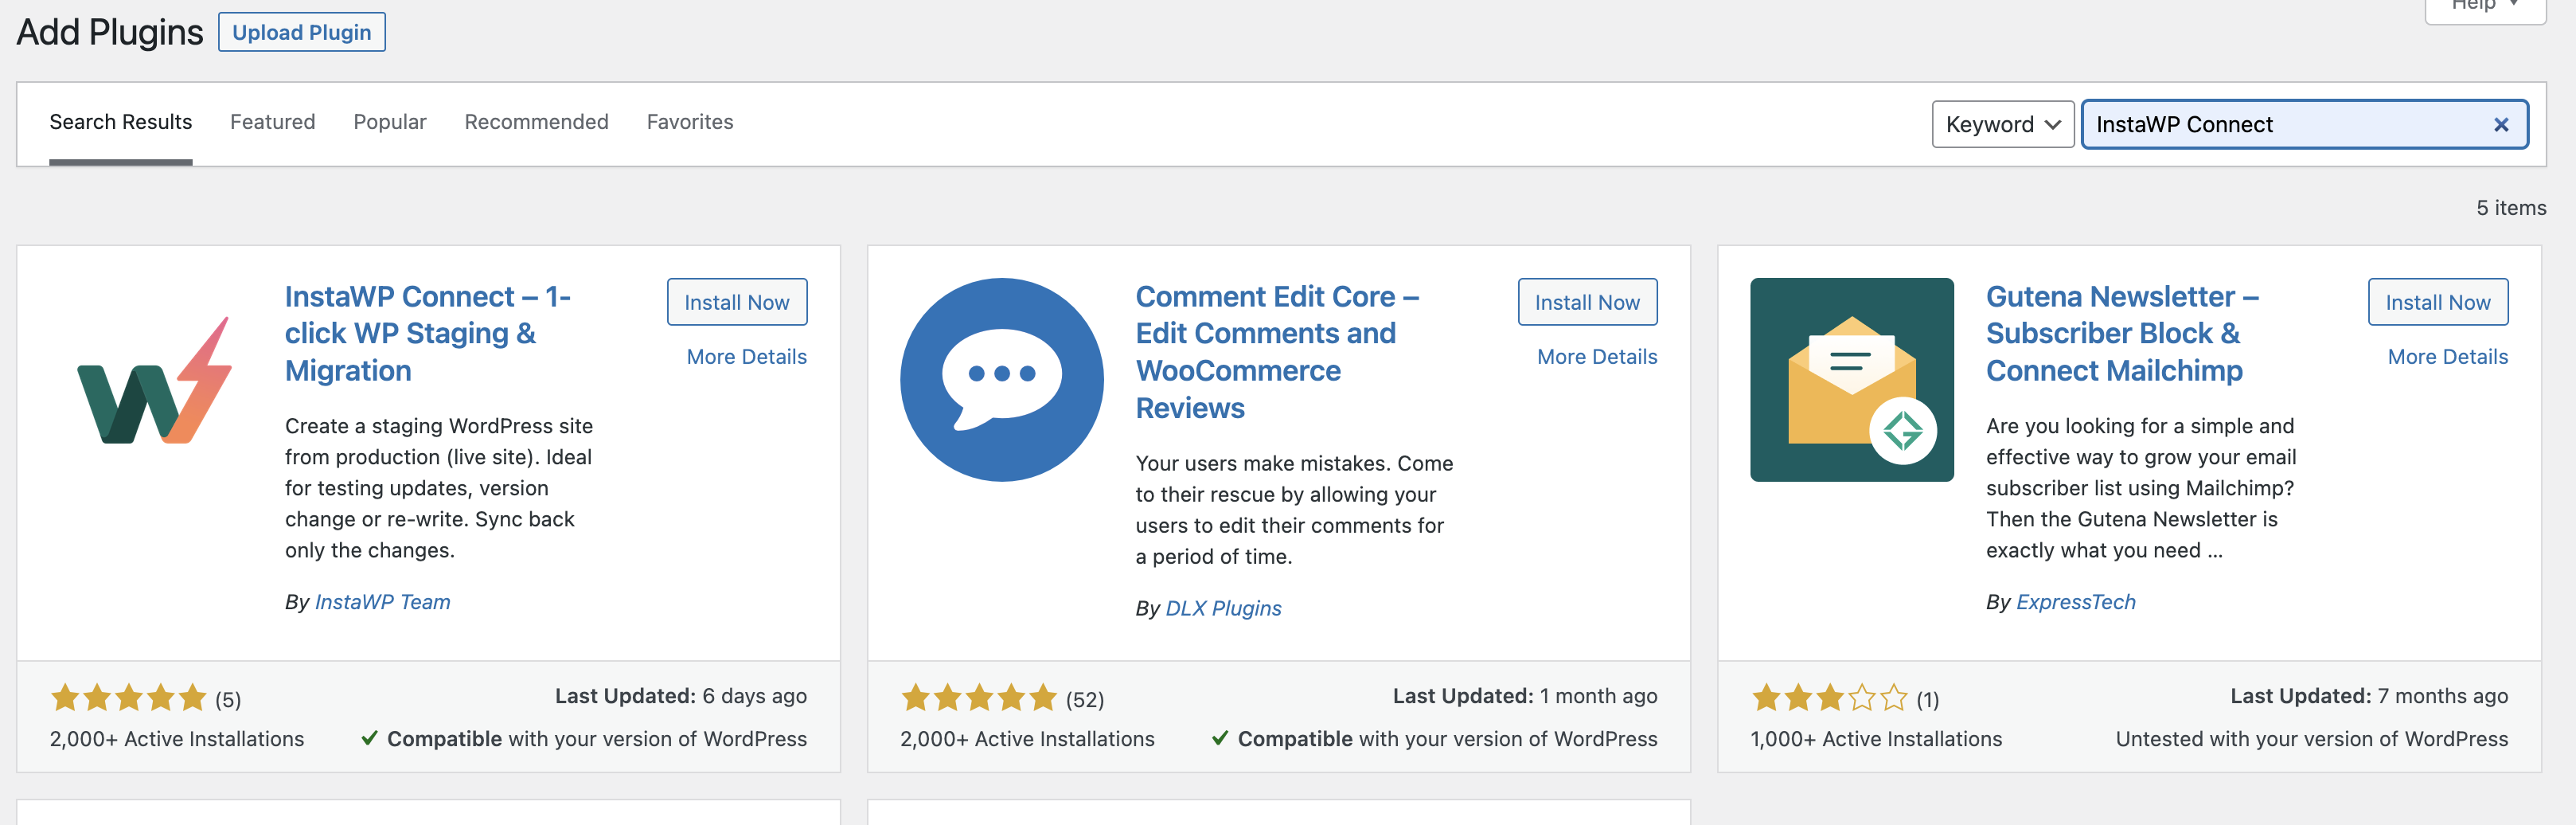
This plugin is the connector from your site to your instaWP temporary site, therefore please search for this in the add new plugin section of your site:
Step 3:
Once installed and activated, you can click on "Create Staging" under the plugin name in the plugin menu or navigate to Tools > InstaWP then choose the Connect button. A new tab will open or you will be redirected to an authorise page within the InstaWP dashboard - choose approve to create the connection. After completing the process, you will be redirected to your site with a successful connection. You may need to refresh the page on your site if the success message does not appear immediately.
Step 4:
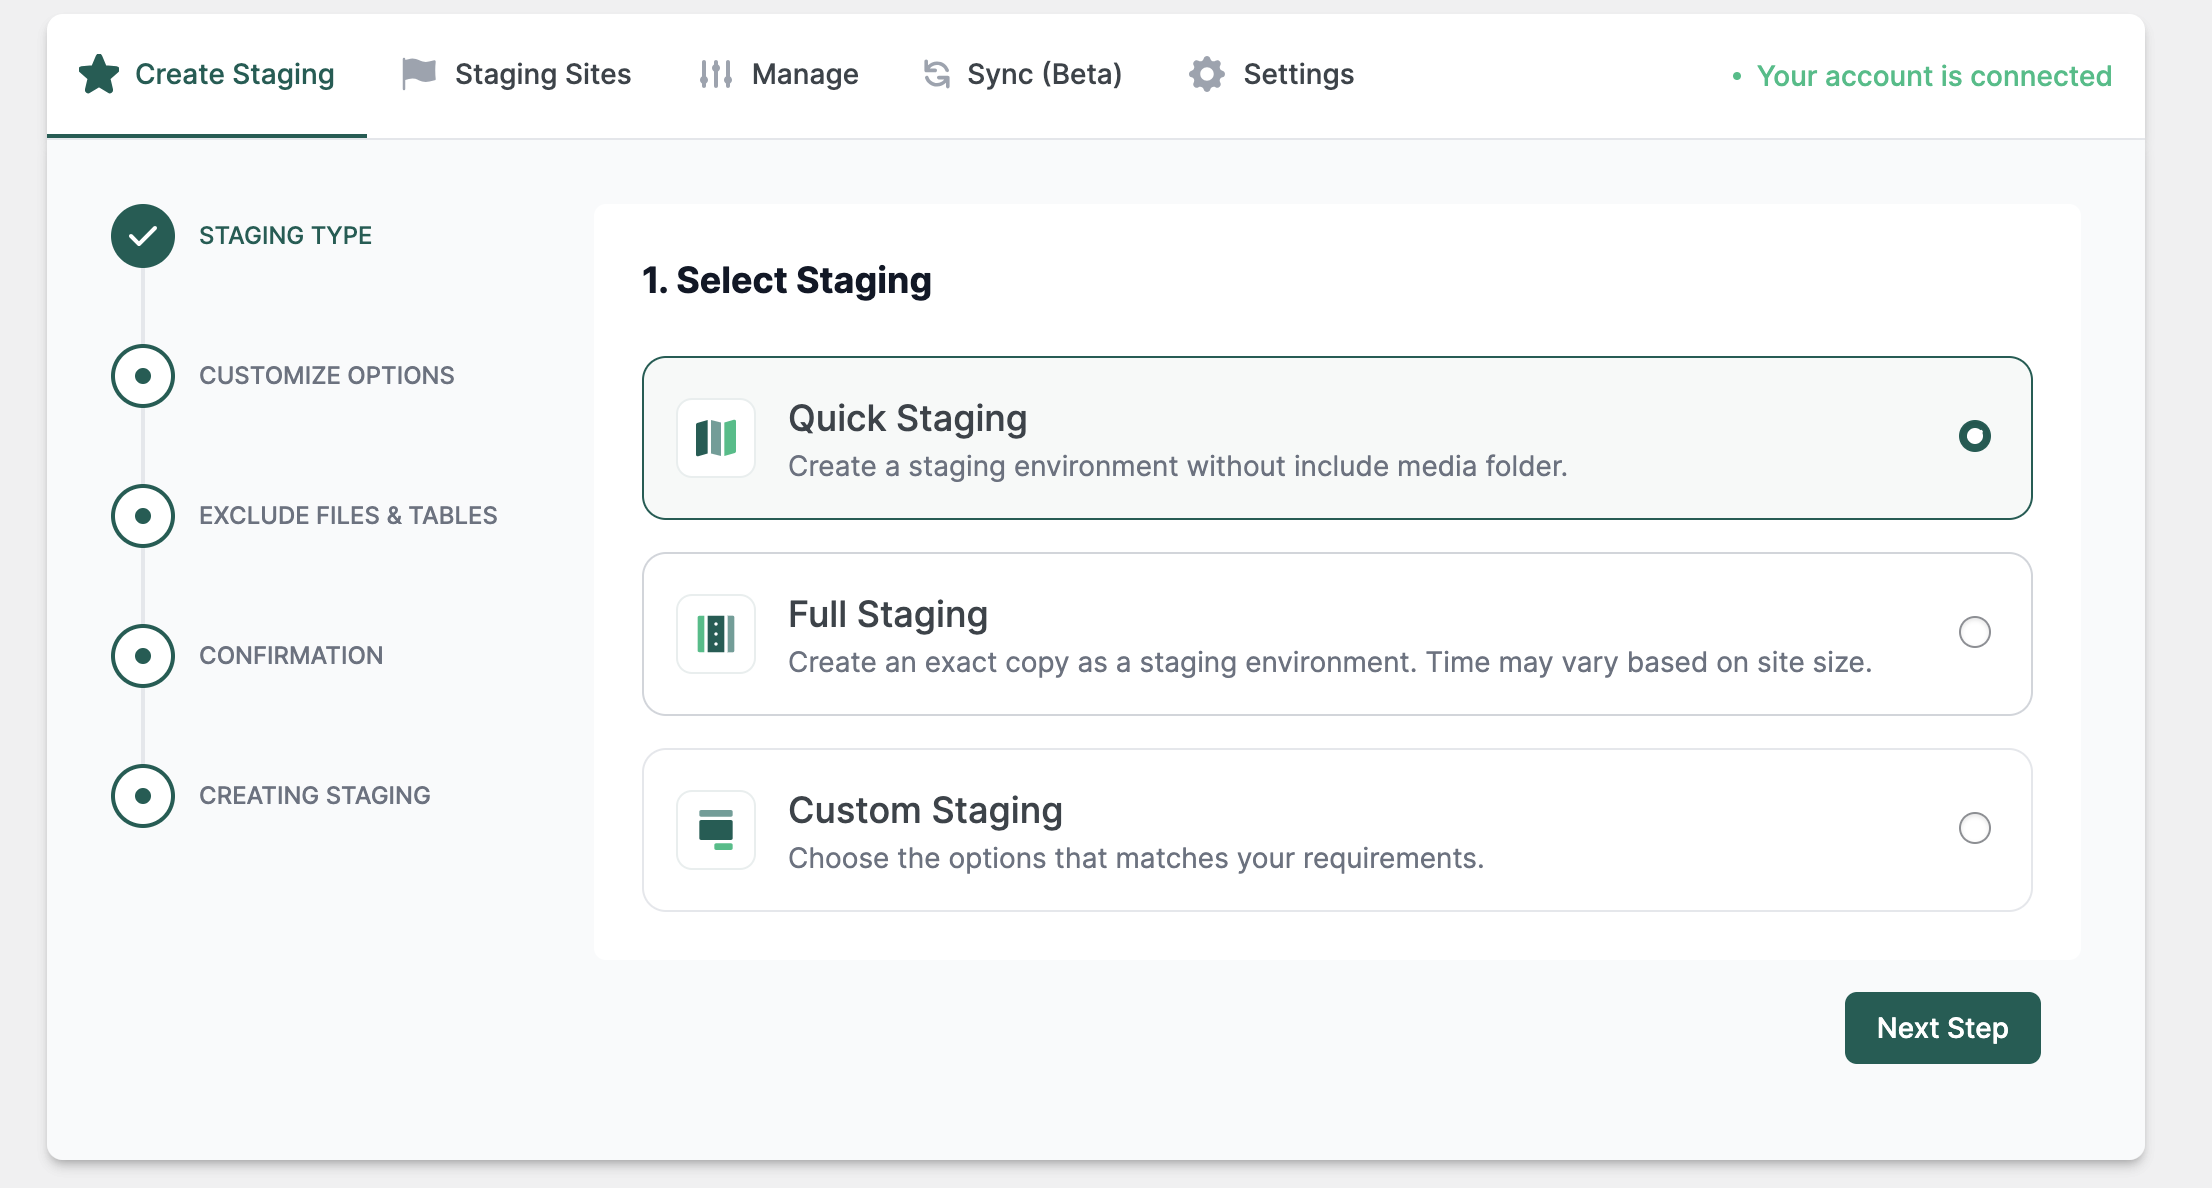
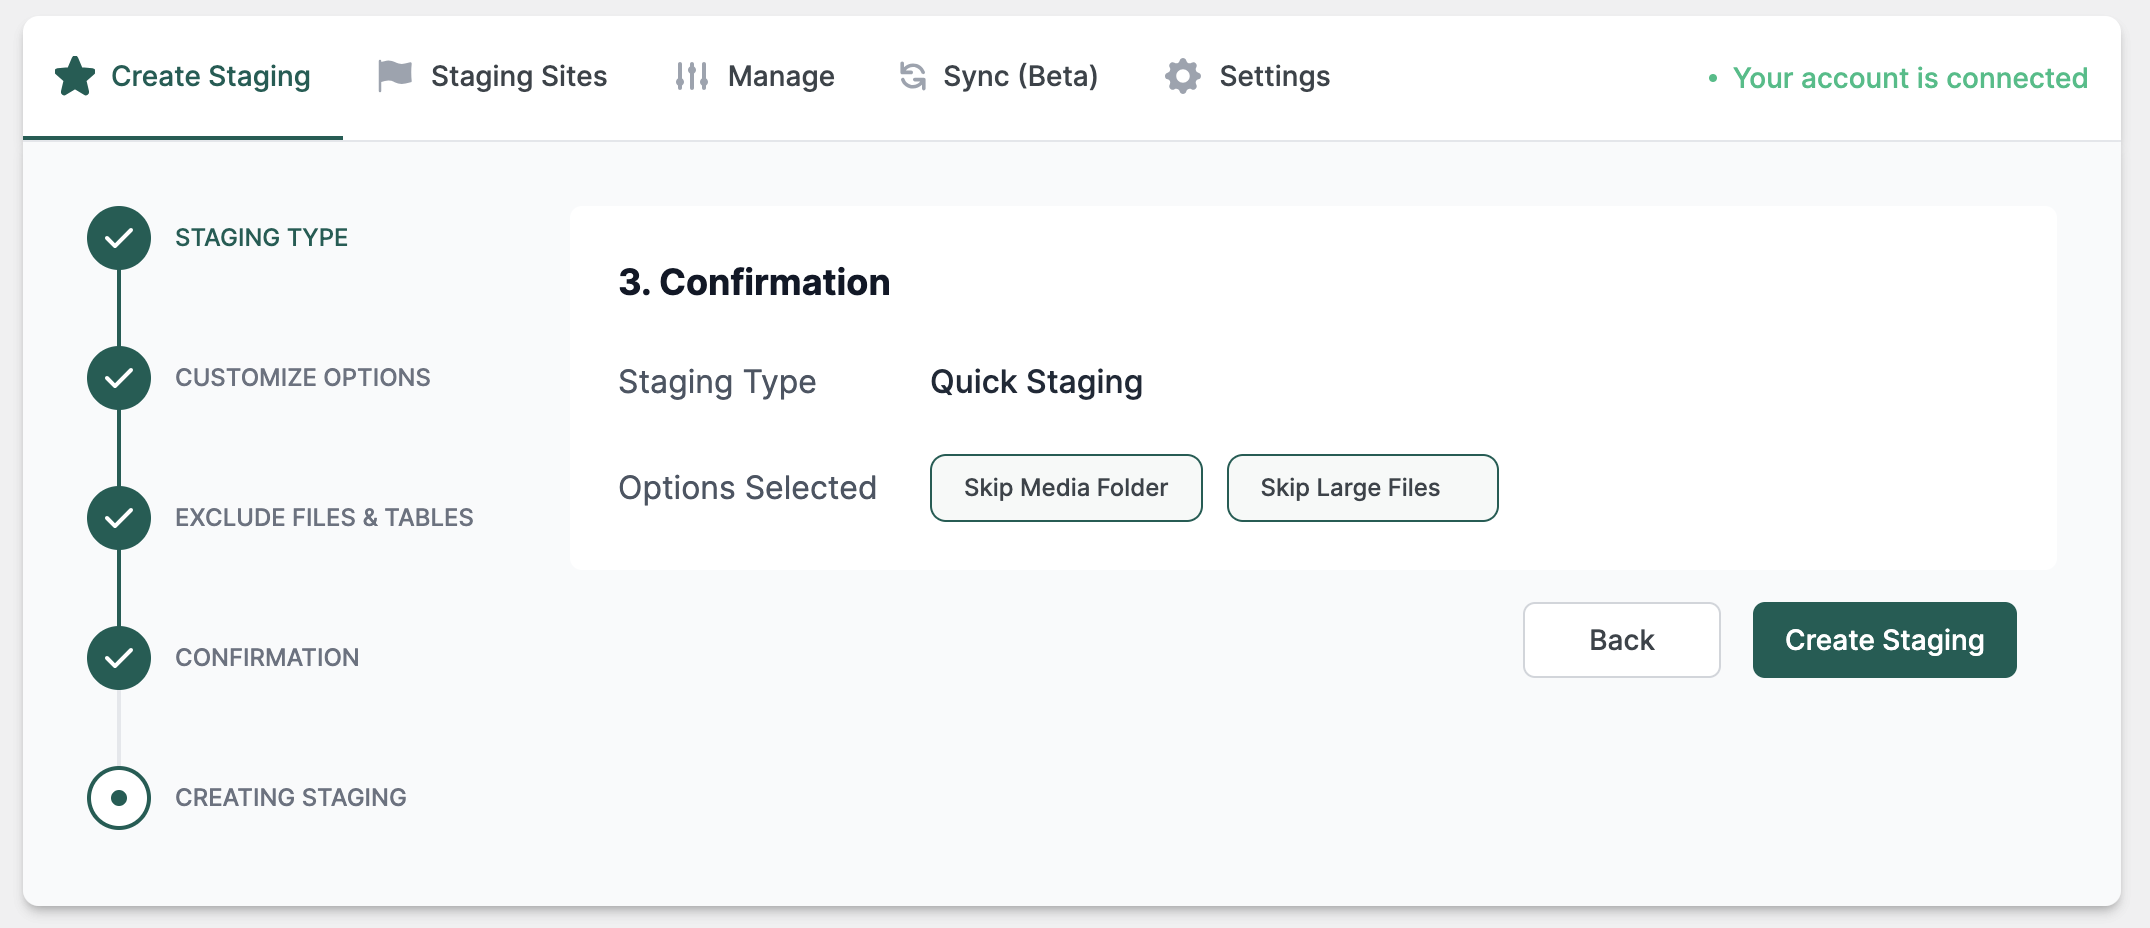
You will be presented with 3 options to create a staging site, we recommend you choose either of the first 2 Quick or Full - the last one is more advanced (feel free to choose this if you feel comfortable with the steps). The difference between Quick or Full is that the media library (Images, Video, Audio) is not uploaded in the quick but is in the full - as this is not necessary for debugging you can choose quick but to be more thorough and your media library is not very large then you can choose full.
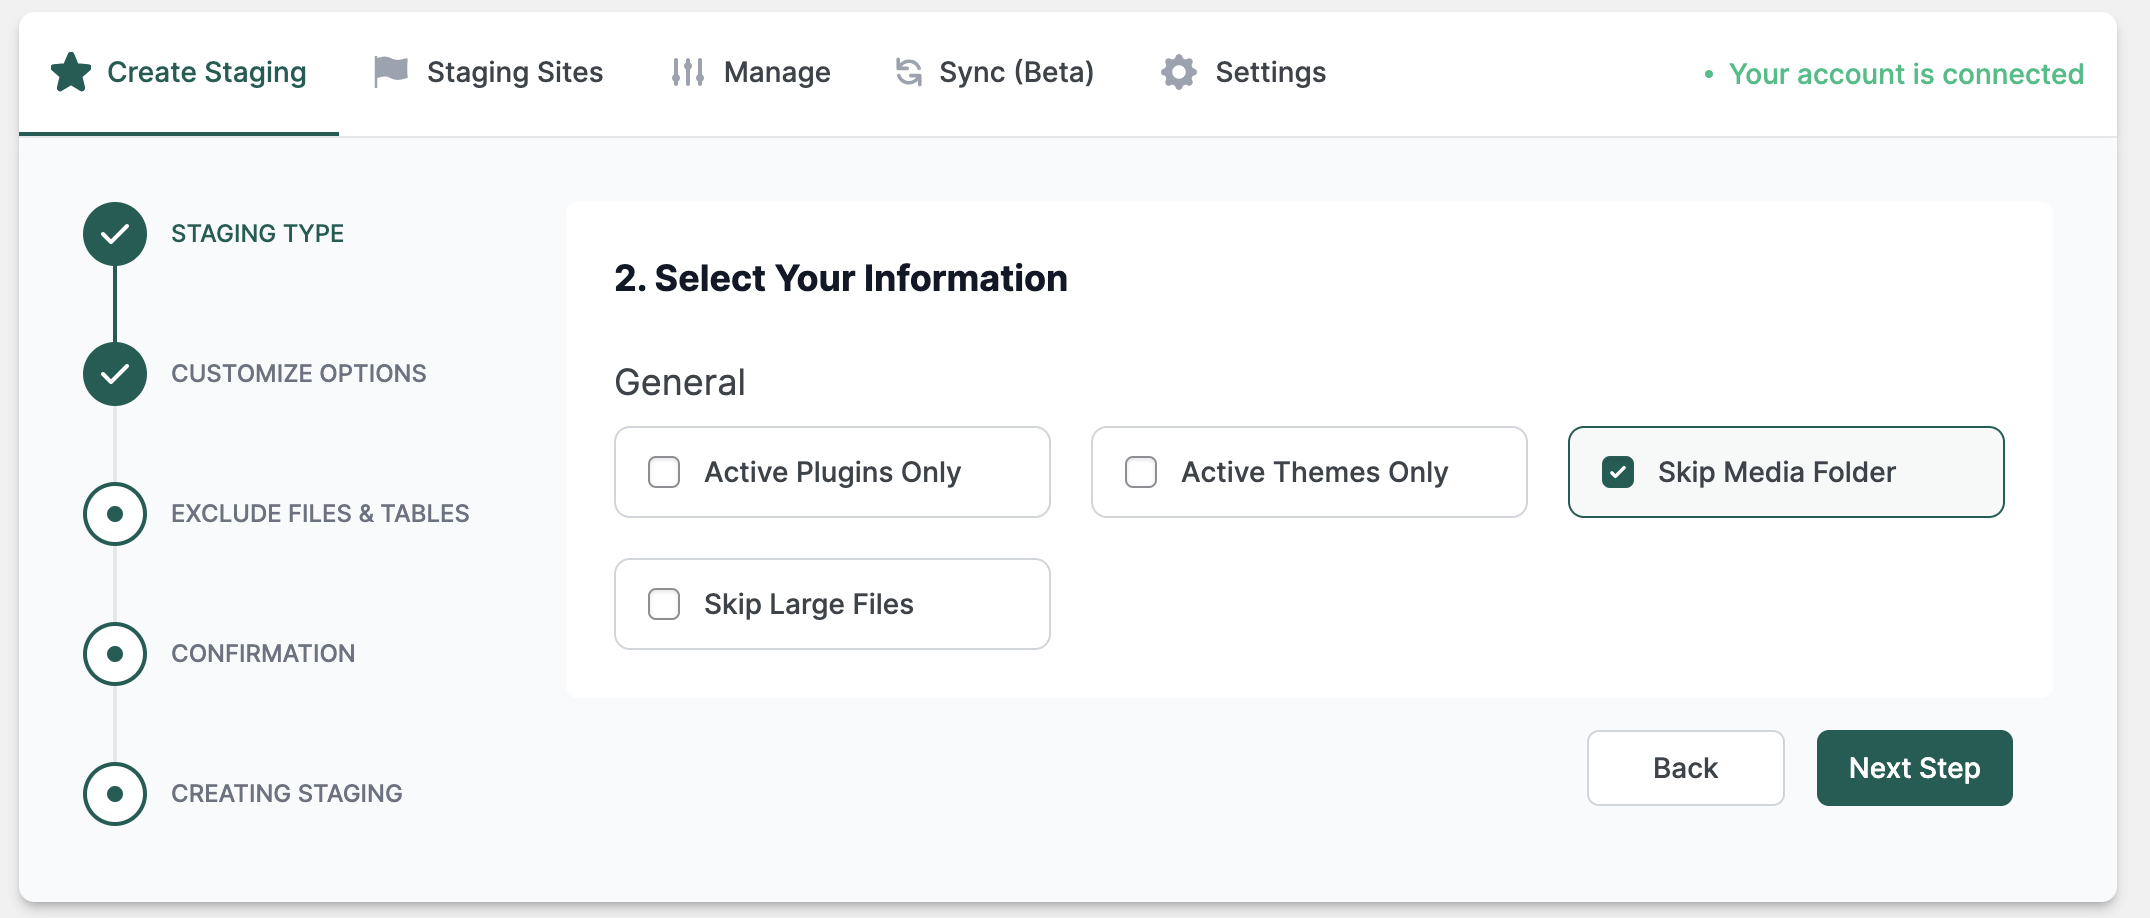
Next you can further customise by choosing to include only active plugins/themes - we recommend leaving this as it is under quick but do check skip any large files (such as backup files, etc.) and proceed to next step.
The next step adds more customisation by allowing you to exclude any specific tables, etc. - again you skip to the next step here to the confirmation step, where all you need to do is click Create Staging
Congratulations! 🥳
That's it (almost)! The process of migration will begin and once it is complete you can now access your cloned site from your instaWP dashboard
Ok, great now what?
So now that you have a cloned site up and running you may be thinking so what now? The first step you should take is to replicate the issue that led you to this point. If the issue is resolved and does not reoccur, it strongly indicates that there may be a conflict caused by security software within your existing hosting server environment. Further investigation is necessary in such cases. If the problem persists or can be duplicated, it is advisable to disable (and delete if necessary) all other plugins and custom themes individually. This will help determine if the error is caused by an interaction with another plugin.
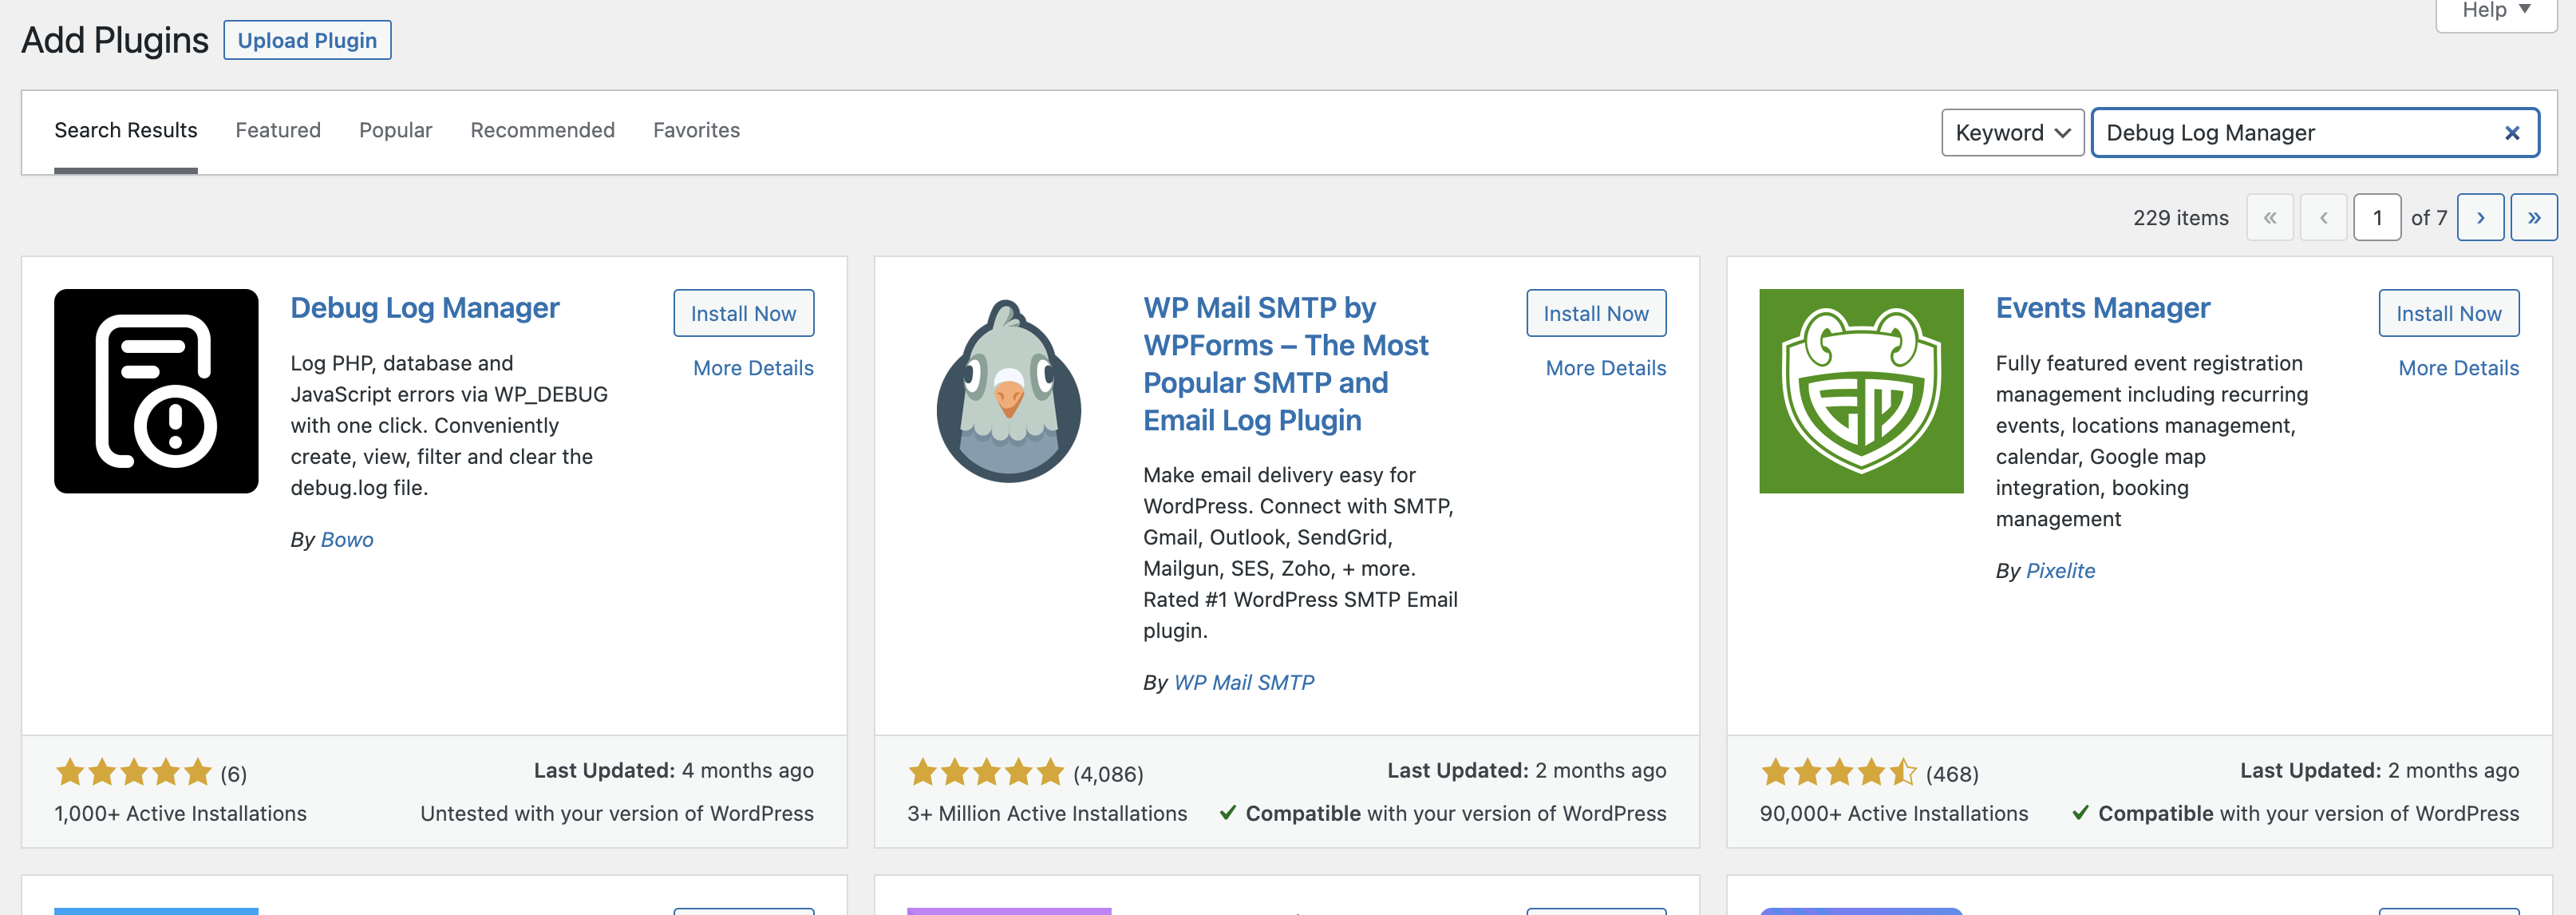
Bonus Tip:
Install the Debug Log Manager plugin to troubleshoot. It will provide useful insights to identify the issue's root cause.
If your issue is still persisting after these troubleshooting steps then we would advise to open a support ticket with us so that we can help provide some tailored recommendations.